Wednesday 28 December 2011

Parchment Craft Shops Closing


Very sad news that Centagraph has closed and also earlier in the year, Finishing Touches of Totnes.

Tuesday 27 December 2011

Grid and Lace Work


When I first started perforating parchment I didn't really have a clue what I was doing. I didn't understand where to put the parchment! under or over the grid and where did the mat go? It was a while before I found that a good instruction DVD, a great 'daylight' craft light and a magnifying glass made everything a lot easier!

Christine Coleman's Grid and Lace Work DVD is a great starter guide to using PCA Flexi-Duo Grids and PCA tools to create beautiful patterns with both perforating and embossing. Christine shows you how to cut crosses and oct shapes and line up your parchment when perforating and embossing, while working throught several projects starting with bookmarks and then moving on to more complex projects.

She shows you how and where to start a project, how to correct mistakes and also encourages you to use your own ideas to create individual projects. Excellent DVD!

Wednesday 7 December 2011

Parchment Craft Scissors and Cutting Tools

Scissors or Snips
There are several different parchment craft scissors available. They vary greatly in price from about £4.00 to about £40.00 but it is important to have snips or scissors with fine points; decoupage scissors are not fine enough to cut the accurate, neat points required. Parchment craft scissors and snips usually have slightly curved points, the curve should be held downwards when you cut.

Snips or cutters are fairly easy to use, you just squeeze them, there are some cutters that have an adjustable wheel that can be set to the width you are cutting. Some people prefer snips if they have arthritis or strain in the hand / arm muscles.

Scissors are held with the right index finger and the right middle finger (if you are right-handed) and braced with the thumb. The aim is to snip between the perforations you have prepared to leave a neat V shape. It is a good idea to practise this technique, there are several 'YOU TUBE' demonstrations to help. Some people have told me that they get a better finish with scissors but in the end use whatever suits you best.

Edges can be made quickly with the stamp edge tools (PCA), and the equivalent Pergamano 2 Split and 4 Split. These tools will punch holes really closely so that the parchment falls away as you perforate. The edging however, is not as neat as that produced by the longer method of perforating and cutting.

Crosses can be cut with the Cross Knife /Easy Cross and a cutting mat, I have not tried this method, you still have to perforate the holes with a four needle tool and then position the cutter and press down. If anyone has tried the cross knife let me know if they cut crosses neatly.

Wednesday 30 November 2011

Perfect Parchment Craft Shop

The parchment craft shop is now up and running! This is the current advert appearing in Parchment Craft magazine. We specialise in parchment craft tools, equipment and materials, also many other art and craft items for cardmakers and scrapbookers. Keep watching the shop as we list new items every week.

If there is any particular item you would like us to stock please email contact [at] perfectparchmentcraft.com.

Delivery is free on UK orders over £5.00.

Saturday 26 November 2011

Pergamano Parchment Craft by Martha Ospina - A Review


This is a big book 96 pages! It starts from scratch for the beginner, explaining the range of Pergamano tools and equipment that are available and their use. There are also challenging projects for those with more experience, a huge range of projects: cards for different occasions, a fan, a wallhanging, gift box, mobile, tags, lampshade, 3D Christmas scene and lots more. There are also sections which show you how to extend the use of the grid patterns and motifs you have in the book.

The pictures are large and clear and the instructions are step by step and fully illustrated, the book seems to cover all the techniques. There are instructions on all types of embossing, how to use the Pergamano Easy Grid with the Diamond perforating tool, painting using felt pens, inks and paints. A complete course in the art of parchment craft.

Monday 21 November 2011

Parchment Craft DVD Review - The Art of Embossing 1

Kannikar Sukseree's Art of Embossing DVD is the companion to the book of the same name. However if you already have the book it is still well worth getting the DVD as the designs are all new. It is an essential buy for anyone who wants to improve their embossing technique, giving a comprehensive introduction to embossing and the materials and equipment required.

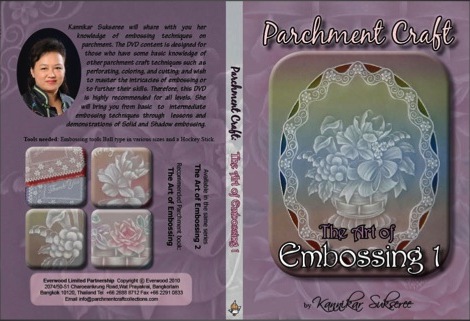
Kanni covers solid and shadow embossing through five different designs. She shows in detail how to use the different tools, especially the hockey stick, which I have always found more challenging than the ball tools.

If you want more instruction on how to emboss leaves and petals using different methods and different tools, when and where to emboss outlines, how to emboss to get a realistic impression of light and shade on your project, this is the DVD for you.

The DVD is split into four areas: the introduction, tools and materials, lessons and the cards are on the final section. The detailed instructions are for four cards and there is a fabulous fifth A4 size design which brings all the techniques together to do at the end.

This is my attempt at design one which demonstrates solid embossing, I am currently working on the next card which is shadow embossing.

Wednesday 16 November 2011

Stippling - A Parchment Craft Technique

(this design is from the book: Pergamano Parchment Craft by Martha Ospina)

Stippling is an embossed, textured finish, in the above project, a parchment photo frame, I have stippled between the embossed edge of the frame and the embossed large scallop, also the curls / flourishes are stippled.

On the project above I think the stippled areas could be a little whiter, so I will do some more work on them and take a picture of the result. Stippling is a really interesting effect and takes a bit of time to achieve, the idea is to tap the single needle tool on to parchment to create an embossed effect, a tiny white dot - not piercing the parchment. The single needle tool is usually used for perforating, but for stippling it is used with a hard card mat underneath the parchment.

Stippling instructions:

Some instructions tell you to prepare the parchment by lightly embossing the area to be stippled first, I didn't do this so this could be why my stippling did not turn out as white as I wanted.

1. Outline area to be stippled with a stylus or micro ball

2. Lightly emboss area if you wish

3. Change the embossing mat to a piece of dark card and on the back of the parchment start tapping the single needle tool in the area you want stippled. You should be holding the tool vertically to get a good result.

4. The stippling should be very close together to produce a texture.

Other variations to try:

Using fine sandpaper between the card and the parchment, I did try this method but it didn't suit me as I kept piercing the parchment.

Using white pencil to colour the back of the parchment to get a whiter result, I have not tried this yet.

Has anyone tried stippling with a scriber or fine stylus?

Saturday 12 November 2011

Pergamano and PCA Tool Compatability Guide

Manufacturers of tools for parchment craft often have different names for the same tool. For example a Pergamano Star Tool is similar to a PCA Sun Tool and Pergamano Fine Stylus is similar to a PCA Micro Ball. For a complete guide to help you identify the interchangeable ones see this Information Sheet

Thursday 10 November 2011

Guide and Troubleshooter for Mapping Pens and Nibs


Buying a mapping pen for parchment craft:

There are three main makes of mapping pen available: Pergamano, PCA (Parchcraft Australia) and Conte. Conte have the finest nib and this is good for white ink and coloured inks but a fine nib does get clogged more easily so a Pergamano nib or a PCA nib can be a better choice with metallic ink. However, a fine nib is not the only reason for a fine tracing line, it is the way it is used.

How to use /hold the pen:

Mapping pens are used for tracing, the aim is to get a really fine line. To do this you need to practise holding the pen almost upright and gliding across the parchment. If you press down it will result in a thicker line.

Before you use a new nib:

There are several ideas to try, some people recommend that new nibs should be dipped in boiling water, others say soak them in alcohol or hot soapy water, another way to condition new nibs is to soak them in bicarbonate of soda and boiling water or even holding a nib in a match flame (do be careful if you try this one).

Ink:

If you haven't used your bottle of ink for a while it might need mixing, you should be able to hear a ball bearing rattling around in white ink, pastel and metallics. They need a good shake to mix them up, however the resulting bubbles on top of the ink when you dip your pen may cause a blot on the parchment. Coloured inks just need a gentle roll in the hand to mix.

How to fill a pen:

• White Tinta Ink, coloured inks
Always wash the nib in water and then dry it before dipping into the ink, or just wipe the nib on a damp sponge front and back, before dipping. Do this every time you refill the pen.
Dip the pen into the ink up to the hole or eye in the nib, if you have overfilled the nib the ink will not run, it may even blot.
• Metallic Tinta Ink
Use a plastic stirrer to get to the bottom of the ink bottle stir it around and drip a very small amount of the ink onto the nib. Always clean your nib before refilling it with more ink.

Nib maintenance:

Normal use means that we touch nibs all the time to wash, store, replace them into their holders. The natural oils from your hand will get on the nib. Use wet wipes to remove these oils.

Troubleshooting:
Ink won't run freely from the nib
- if it is a new nib try the conditioning ideas,
- are you putting too much ink on the nib when you dip?
- are you pressing too hard on the nib?
- is the ink old and thickened (thin it down with a drop of water)
- metallic ink may run better on an old, well used nib

Blots on the parchment
- air bubbles in the ink
- too much ink on the nib

Pen won't glide
- the nib may be blocked up, wash and dry it
- the ink may be too thick

Nib falls out of pen holder
- try to ease the nib out at the base so that it fits better
- try another pen

Tracing can also be done with a white pencil, a fine tip pen, such as a gel pen, precision pen or micron pen but mapping pen and ink is the traditional method. It depends what effect you want in the end.

Sunday 6 November 2011

DVD Review, Parchment Craft, Back to Basics by Pauline Loweth


This DVD is a very thorough introduction to parchment craft. Pauline Loweth guides you through the basic techniques of embossing, perforating, cutting, colouring parchment, using edging tools and finishing cards by working through several small projects. She gives plenty of hints and tips and good advice on how to fix mistakes.

There is also a comprehensive guide to PCA tools and how to use them. The instruction for using shader tools and stamp edge tools I found particularly useful. This DVD gives the best demonstration on how to cut crosses that I have seen, it is very clear and there is advice for left handed crafters as well.

This is an excellent DVD to get if you are just starting this addictive hobby.

Tuesday 1 November 2011

Parchment Craft - The Techniques Volume 5- Using Coloured Pencils


This is the fifth volume in Pergamano's series of starter books for the techniques used in parchment craft. This book explains the techniques involved in using coloured pencils (Pergamano Perga Liners) to colour parchment. As with the other volumes the fully illustrated instructions are clear and there are quite a few patterns to work through step by step as you learn the techniques. There is a clear explanation of the use of oil-based coloured pencils and water colour pencils and using both together. The books are written as a set, this book assumes that you have mastered the techniques that were covered in volumes 1-4. I have completed one of the patterns (shown above) and found the instructions very good. There may be a problem if you choose to use pencil crayons that are not the brand Pergamano, the instructions give the 'numbers' which are coded on the Pergamano pencils rather than colours. So you would have to try and work out the colours yourself using the illustration.

Saturday 29 October 2011

Parchment Craft - A New Dimension by Pierrick Gaffard - A Review


3D paper craft construction is very popular and this book has lots of dimensional projects such as, vases, clocks, flowers, a watch, fans and a  model of the Eiffel Tower.  The construction ideas are very clever, they are challenging to make but there are patterns for crafters with varying levels of experience.  
I love the way the patterns are laid out, with essential materials needed for each project in blue at the bottom of the page. Big, beautifully clear pictures and easy to follow instructions.  
This book is inspiring, it would make a great Christmas present for a parchment enthusiast. It is not for the absolute beginner as there are techniques used within the patterns that would require a little experience.

Tuesday 25 October 2011

Using the iPad for Parchment Craft


I have come across two apps for iPad or iPhone that help me draw birds and flowers from my own photographs. The first one, called 'CopyIt', provides a grid overlay on a photo of your choice using the traditional grid drawing method to break down the picture into smaller areas of work and helps you to reduce, enlarge or just copy accurately. Choose the photo from your iPad and then choose the colour and size of your grid overlay, and then you draw onto a grid you have prepared in your sketch book using the reference gridlines.

The other app is called 'Tracing Paper', on this app using a photograph you want to copy, you actually trace the photo on the iPad with your finger. The drawing can then be printed or emailed to yourself for printing. This method is very quick but not as accurate as the other app. Please comment if you have come across any other useful software?

Saturday 22 October 2011

Parchment Craft - The Techniques Volume 3


I am really impressed with this set of early books which I think are useful both for starters in parchment craft and those who are a little experienced but need some reference to the techniques they learned a while ago.

This book concentrates on colouring parchment, using Dorso pastels and Perga Colour felt pens. All the techniques of applying pastels and felt pens to parchment are described in detail with step by step photos and plenty of tips along the way. There are also several patterns to work through.

Monday 17 October 2011

What are Dip Dots?


If you come across a pattern that asks for 'dip dots' these are round, rather neat embossed, dots of paint or ink. Using a ball tool, dip into the paint or ink and in an upright position dot the ball tool onto the parchment. The dots can be embossed from the back, when the paint is dry.

This is a card I made using a dip dots circle around the pansies, it is designed by Christine Coleman.

Thursday 13 October 2011

Cutting Techniques

Once you have practised cutting crosses from the perforations made by the four needle tool and become quite good at it, the next challenge is cutting out the perforations of the other multi-needle tools like the Oct, eight needle tool. The difficulty is that with many multi-needle tools some of the needles are further apart than others, so that when you are cutting out you get a raggedy result. To get a neat result with the Oct tool -cut between the larger distance needles first.

Wednesday 5 October 2011

Parchment Craft - The Techniques Volume 2

This is the second volume in the starter series by Pergamano. It concentrates on two techniques: perforating and cutting. There are step by step illustrated instructions and a lot of tips to help get a perfect result. There is an overview of all the multi needle perforating tools and the patterns they make. The second half of the book concentrates on the techniques involved in cutting, which a lot of people find difficult to start with. Instructions for use of 2 split and 4 split tools are also included. A very detailed, easy to follow book with some great tips and step by step instruction through practise exercises and several projects to make.

Wednesday 28 September 2011

Royal Lace by Julie Roces

A book of 26 fabulous whitework designs. The lacework is incredibly detailed, there are fans wall decorations and cards all indiviually named after Royal Family members. Julie uses embellishments such as pearl beads to enhance the lace.
This is probably a book of patterns for someone who has some experience with embossing and perforating techniques. It would make a great Christmas present for a parchment craft enthusiast.

Saturday 17 September 2011

Parchment Craft Essentials

When you start a hobby such as parchment craft where the range of equipment required is quite large, it is often difficult to decide what to buy first. If you have seen a pattern you really want to try, it will have a list of special tools and equipment required for that pattern but there are essentials that you probably cannot do without.

Parchment 140,150,160gsm
For tracing: a white pencil, white Tinta ink and a mapping pen and a ruler

For embossing: a range of ball tools or shaders and a sun/star tool and an embossing mat.

For perforating: a single and twin needle tools and a thick perforating mat, scissors or snips

Colouring: I think I would go for a pack of pencil crayons first and a pencil sharpener of course

Don't forget that if you want to buy a grid make sure that your perforating tools are the same make. PCA tools fit PCA grids and Pergamano tools fit Pergamano grids.

Thursday 8 September 2011

Beginners to Parchment Craft - Book Reviews -1


Parchment Craft Volume 1 The Techniques Step by Step from Pergamano

This book concentrates on three techniques essential to those starting parchment craft. These are Tracing, embossing and stippling, very detailed instructions are given with loads of step by step photos to help you start the craft. There is a bit about the history of parchment craft and a list of materials needed, most impressively there is a very clear explanation and full size photo of all the embossing tools and a description of what they are used for, though this may be slightly out of date as the tool handles have changed and there may be extra embossing tools available now. Nevertheless it is good for basic information. Lots of tips, and I was interested to see that a metal engineers ruler is used in this book, as I prefer this rather than the plastic one.

Friday 2 September 2011

Which embossing mat is the best?


There are a lot of embossing mats to choose from, hard rubber mats, softer foam mats, felt mats. These are all thinner than the perforating mats which are 10mm or more. If you are in a position to try out different mats at a workshop you can see which ones suit you,but if this is not possible the following may be useful. If you feel you are 'heavy handed' then a harder embossing mat will probably suit you, for example, a rubber mat. It is also important to keep your embossing mat for embossing and nothing else. If you perforate patterns on an embossing mat the indentations on the mat can prevent a smooth result when embossing.

Sunday 28 August 2011

Perfect Parchment Craft


I am in the process of setting up an online store, for parchment tools,equipment and accessories. The web site is not finished yet but I will post updates as to how it is progressing or click on the link to see how it is progressing!

Saturday 13 August 2011

Stencilled Iris

This is the first project I have done

in the 'Stencilling with Pastels' book. The instructions were clear, I added a backing behind my frame for more depth of colour and to prevent parts of the iris leaves showing through the vellum frame. Perga spray was very good for the invisible glue, it also is repositionable if you don't get it right first time.

Monday 8 August 2011

Stencilling with Pastels

By Jannie van Schuylenburg

This is a great little book, 21 designs which look new and fresh. I love the Black Tulips design. The motifs are coloured through a stencil. There is no room for error because you can fix a numbered chart beneath the parchment and then stick the corresponding number stencil on the top, matching the numbers and shapes.

There are two types of pastels available, to do these designs you will need the ordinary box rather than the soft colours. There is quite a range of stencils, this book uses all the flower stencils. Iris, anemone, water lily etc.

I really enjoyed trying out this technique, the crayons are water soluble you use a damp finger to rub the colour on. It takes a little bit of practice to get the dampness just right. Details can be applied with a damp brush at the end.

Thursday 4 August 2011

A Quick Guide to all the Techniques

A really quick guide to all the basic techniques for a beginner, with very clear pictures and text. Tracing, perforating, painting, cutting, stencilling and more.
Click on the heading for the link to Pergamano.

Tuesday 5 July 2011

Workshop Holiday Project


This is the project I finished (not framed yet) at the Christine Coleman /Alison Yeates Parchment Craft workshop. I had a great time! Thanks to everyone.

Sunday 3 July 2011

Why Perforate Twice?

This is information I have gathered from books and talking to others, please comment.

Beautiful lace borders are produced by perforating tools. The four needle tool, for example is used to create the delicate cut-out crosses. There are also many multi needle tools that can create unlimited patterns. However if they are used with too much pressure the parchment can be weakened and sometimes break. The answer is to perforate twice; first perforation is just to pierce the parchment and should be done on a thin cutting mat to stop the needles from going too far, the second perforation should be on a thicker mat to make deeper holes, which, in turn will be easier to cut neatly. Also embossing can be done after the first perforation when the parchment is not weakened by the cut-work.

Sunday 5 June 2011

Designing Cards

Flowers

Putting together a design that looks and feels right is probably more difficult than it seems. There are plenty of copyright free line drawings of flowers in, for example Search Press books and Dover Publications. Also photos can be transferred to drawings by using a grid of squares and transferring the outlines using the squares as guides. If you have and iPad you can get an app called 'copy it' which is a grid that can be sized up and set over your photo on the screen.

If you are creating your own flower pictures there is plenty of advice in art books on composition. It is however, important to group flowers in odd numbers as this is most pleasing to the eye. A triangle shape can be used as a basis for a collection of flowers making sure that larger blooms are at the base to balance the design.

Saturday 4 June 2011

Parchment

I mostly use 150gsm and 160gsm plain parchment paper for my projects. One of the problems I had when I started out was that the parchment buckled and curled and sometimes the natural oils on my hands marked the parchment.

Most of these problems disappear when you get used to parching. For example, it is often a good idea to rest your hand on a piece of folded kitchen roll, protecting the parchment from oils and heat from the skin.

A beginner may not yet have developed a lighter touch because the work demands a high level of concentration and so it is difficult to relax. This improves the more you practise.

Certainly it is not a good idea to put moisturising lotion on your hands and then work on your parchment! Unless of course you are going to wear gloves!

Monday 30 May 2011

Paints, Pencils and Ink

Pergamano Tinta Inks

These are water based inks, the white ink is opaque but the colours are translucent - they can all be used for tracing but the inks can also be used for painting and give a matt finish. The metallics are also great for tracing.

Pergamano Dorso Pastels

Dorso pastels can create beautiful backgrounds on the reverse of the parchment. Together with a medium such as dorso oil or zest it or white spirit and a piece of kitchen roll, two colours can be merged together giving a smooth, colour changing background. Pastels can also be used on the front of the parchment.

Pintura Paint

Unlike inks, that have a matt effect, Pintura paints give a glossy finish they are also water based paints and they dry very quickly. It is probably a good idea to start off with a tear off palette and brush and a very small amount of paint (one drop).

Pinta Perla Paints

These pearlescent paints can be mixed with Pintura, so I find the white Pinta Perla very useful for mixing and making a pearlescent paint. Daler Rowney also make beautiful pearlescent paints.

Perga Colors

These are water based felt tip pens and can be mixed on a palette. Letraset also have a great range of water based pens.

Perga Liners


These are pencil crayons, the combi box provides both oil based pencils to seal the parchment and water based pencils for colouring over the top.

There are many makes of pencil crayons available, Faber Castel, Lyra etc.

Saturday 28 May 2011

Mapping Pens

Have you ever had trouble trying to get your mapping pen to work nicely? This is advice from my experience with pens and ink:

I started off with a Pergamano mapping pen. The nibs were a bit scratchy and I found I was putting rather too much ink on the nib, you should only load to the hole in the nib. I have had problems making the ink flow on the parchment, it seems that I couldn't trace without blobs appearing or no ink at all. The answer may be a new nib, the advice is to rinse the new nib carefully in soapy water before you start, also make sure that the white ink is shaken until you hear the ball rattling. With coloured inks just twist them gently to mix.

I have also tried the PCA mapping pen and nibs and have had similar problems, too much or too little ink on the parchment and a scratchy feel to the pen. I have been advised to hold the pen lightly and glide over the parchment keeping the pen as upright as possible and positioned so that you get a very thin line.

I have now tried a Conte mapping pen and so far have not had any problems, the nibs are probably more expensive as you buy them singly, but I suppose that it is worth while if the tracing is smoother and finer and more accurate. Anyone else got any advice?

Friday 20 May 2011

Owl

This owl pattern is from the book 'Borders and Decorations' by Martha Ospina.

Thursday 19 May 2011

A Review of Borders and Decorations by Martha Ospina

A really useful book if you are just starting to design your own cards and like me you don't really know where to start. This is a half way stage between using other designers patterns and designing your own from scratch.

A range of perforated, embossed and coloured borders are provided to be used with various pictures but you could just as well use your own pictures within these borders. The pictures included are not only flowers, but a dragon, dolphins, an owl, teddy bear. I particularly like the delft blue card inspired by the china. Advice is given on composition and very detailed instructions.

But if you don't want to mix and match there are eleven complete patterns as well.

Sunday 15 May 2011

Tulips

This is a fairly simple design using a line drawing of tulips from a copyright free book. The frame was perforated and embossed using a siesta grid.

One stroke painting

This is a design from 'Amazing Brushstrokes' by Kanni Sukseree, it is my first attempt at one stroke painting. She makes it look so easy but I find it quite challenging!

Monday 2 May 2011

Hockey Sticks


I have been practising using the hockey stick embosser. Pergamano make the hockey stick and I have two, one is the new pink handled one and the other is the older silver handled one.

I have found that the older version seems easier to use and I'm not really sure why. Visually the handle is shorter, and the hockey stick end has a fractionally different angle. However it is not easy to buy an older hockey stick unless you know someone who has one and you can try it out.

I have found excellent advice on how to use the hockey stick on Kanni's DVD Embossing:

Saturday 23 April 2011

Make your own envelopes

Envelopes should be the right size for the card, I have found that pearlescent paper is strong enough for an envelope.

My method for making nice looking envelopes to fit any size card.

You will need:
12" x 12" paper
Power pritt stick glue
Double sided tape

Equipment required:
Paper cutter
Envelope score board
Ruler

1. Measure the diagonal of the card (I'm using metric)
2. Add 2.5cm to the diagonal measurement
3. Use this total to measure and cut a square of envelope paper using the paper cutter.
4. Centre the card on the square of paper like a rectangle over a diamond (the corners of the paper should be above the sides of the card), and score the sides of the envelope 1cm larger than the card, making sure that the score lines cross over at the corners
5. Cut out the upper triangles where the score lines cross
6. Round the envelope flap with a punch and emboss if you want. Glue the envelope together and use double sided tape on the flap

I have tried different methods but this one has worked out the best, I have adapted it from the instructions in the enveloper made by Crafters Companion, a brilliant product!

Sent from my iPad

Thursday 21 April 2011

Embossing with a Star Tool / Sun Tool

How to use a star tool (Pergamano) or sun tool (PCA)


Press the tool gently onto the parchment and move your hand in a circle. This works best for me in an anti-clockwise circle, but I am right handed. If I use a clockwise circle I get an ellipse!

A thinner harder mat is better for embossing.

Wednesday 20 April 2011

Pergamano - The True Passion! DVD Review

An introduction from Martha Ospina, who introduced Parchmentcraft to Europe.
The DVD is purely instructional, unlike other DVDs I have bought, this one does not have a pattern to work from. You watch the demonstrations of all the techniques and then apply these to your own work.

If you are a total beginner this will be a very useful purchase if you are unsure how to start, it covers all the the basics for example how to :-

Trace using a mapping pen
Embossing techniques and effects
Perforating, using the mesh type grid
Cutting, how to hold the scissors and cut crosses
Dorsing
Dabbing using templates and without
Painting using paints, crayons, ink and pens

It also introduces the International Parchment Craft Academy and informs about the Pergamano company.


A thorough introduction to parchmentcraft giving instruction, demonstration and tips, and a history of Pergamano, but don't expect any patterns to work on.

Monday 3 January 2011

Christine's DVD -Working with Pencils


I love this instructional dvd! If you like using coloured pencils you will enjoy the projects on this dvd. Demonstrations for using polychromatic pencils and water colour pencils and plenty of advice like the importance of keeping the pencils sharp.

The projects include flowers, a face, a bird and a lovely final project fuschia which has a lovely grid work frame and is large enough to use as a picture. The demonstrations are very clear the close up camera work is so helpful when you are not quite sure of what you are doing! And of course you can spin it back and try again.